If you are new to Freecad, switching from other software, etc., you may find you're self in a tricky situation while you are in sketch mode. What I mean by that is the habit we get overtime, while we are in 3D mode and rotate things around.
As in the following image, we can see how the default sketch does look like. "Top" view, of course.
But, as I mentioned, we may accidentally move the mouse, while holding the buttons, and orientation is "lost", so to speak. The reason is, sketch mode, by default, does not have a fixed orientation. Same situation is within other software.
So, if you got your self in the situation as in the image below:
all you have to do is to go to the Sketch menu, and select "View sketch". >> Sketch -> View Sketch
Or, simply click the same icon, which is available on the toolbar.
This method in applying vignette effect isn't quite new. To apply vignette effect, through Video Sequence editor is possible, but for quality reasons, might not be always a good choice.
It might happen, that in using this method, instead of using composer, could give some issues at the end results. But if, on the other hand, project is actually done completely in VSE, than this would be the one option to use, among few others.
I have already used this method, for the very same reason, and that is i could not go back to the Composer. I intentionally tried to do these complete projects inside Sequencer only.
These are the few examples:
The trickery is quite simple:
In the top info bar (editor), in layout dropdown menu, slelect Video Editing Layout.
After layout is opened, within Editor type drop down menu choose UV/Image Editor.
Instead of View mode, choose Mask.
In Sequence Editor, add any image, or, as in the following step, add Color strip, just for the purpose of this tutorial.
Imported image will be immediately shown in the Sequencer preview window.
Next, add the Color strip.
While mouse is over the sequencer, using CTRL+A keys, open Add menu, then choose Color, within Generate list.
We'll notice, that Color strip covers the image bellow.
In UV/Image editor, create click on the New button to create a new mask, and then, press "N" to show Properties side panel, and "T" to show Tool Shelf side panel.
Make sure, by that resolution is set to 100% with in Dimensions dialog. Use a small triangle, in the top_right corner, to add additional window, or editor, to the layout.
If it's set to 50%, instead of 1920:1080 px, it would be 960:540 px.
Use, again, triangle, to remove the Properties window, by dragging and holding triangle to the right, and after Right Arrow appear, release the mouse button.
At this point, simply press "F12", this will bring render, or, content from the sequencer, into UV/Image editor. This helps to achieve precision while making masks.
In UV/Image editor, use "HOME" key, to fit the content, or render, to window. And in the Properties side panel, under Display dialog, set current position to center.
Enter X:960px, and Y:540px.
Cursor is at the Center, as shown.
Next, in the Tool Shelf, click on the Add Circle button. Circle should appear in the center of the image.
Use "S" key to scale the circle.
And use "ALT+S" keys to set the size of the Feather, or, edge softness.
Under Mask Display dialog, check Overlay.
This option will show the mask.
In Sequence editor, under Modifiers tab, from the dropdown menu, select Mask.
Within modifier, activate Maks button, and bring the mask created earlier.
Mask is going to appear in the Sequencer preview window.
But, requires some additional changes.
Back under the Strip tab, in the dropdown menu, select Over Drop.
In the Preview window, content bellow the mask should appear.
Now, for the mask to work is it should, it has to be inverted.
To do that, use the icon, next to the Opacity parameter.
To see the change, click on the Refresh Sequencer button.
It should work.
In the Strip side panel, to adjust the strength of the Vignette effect, adjust Opacity parameter.
That's it.
If you prefer video, to help understand this tutorial, watch the video below:
It's been a while, but finally i'm having a lot of free time to work on these tutorials.
At this point, i'll be focusing more on Blender tutorials, and get back to FreeCad very soon. For some time, already, i was working on a way to animate 2D material, without using 3D space, or Node setups, as those areas can, in a way, slow down the process, for this particular method i was aiming to use. Meaning, this method is video editing, in general, but, method is for more practical when it comes to commercial software products usage. In Blender, video editing does not support such workflow, maybe yet, which could make a lot of things easier, but there is a workaround.
The idea is to, also, avoid usage of addons or plugins, scripts, etc. Meaning, to keep things as they are, and to practically see whats missing, what could be potential contribution to the Blender, which i might add, among these tutorials, as an idea for developers.
Now, about this videos. These five examples, shown below, and in a video, are in general reference for tutorials i'm going to publish in the next period. I'll probably do my best to make them available in short period of time.
When it comes to the workflow, probably, in a standard way, i would use 3D scene to make all of these, as there are available all the tools we need. But, to make things quite faster, it's possible to use only video sequencer editor, even, there's no such tools available. It would take only some trickery to include, and one of those are masks, from the UV/Image editor.
Below are 5 examples made using this method. Video, of these 2D animations, is also provided on Youtube channel.
Along these five 2D animations, few more tricks are available also in this video, which will also be included in tutorials to come.
For now, i decided to add additional Blender tutorials, and cover architectural textures and surfaces, which are too often, or, heavily used in industry. But, with one major change, i won't be using any image textures, instead, all of those materials and textures will be made using procedural method.
Reason for this, is that there will be no need for а large disk space usage, everything is narrowed to a few kilobytes or megabytes, that depends of а scene complexity, but in the same time it will give huge amount of flexibility.
Manipulating the nodes, to the full power, so to speak, needs accurate knowledge on what these nodes are able to do. There are endless possibilities, or variations, of what they can achieve.
Meaning, along with this tutorials, i'll try to cover theory also, and what those possibilities are.
At this moment, there are only four tutorials, (bricks, stucco, concrete and tiles) but will grow in time. Since i'm covering Freecad tutorials also, there will be projects, as well, in texturing Freecad projects in Blender. How to prepare files, do additional work, make corrections on objects, and render.
These tutorials, asd previous, can be found at »TutorialField« YT channel.
Here are 30 FreeCad tutorials, made for a product design learning purposes.
Please note, that, these tutorials are, at the moment, for demonstration purpose!
Website, TutorialField, is still under development, so, all tutorials made untill now, will be in-depth explained. I understand how at the beginning, or at getting started, as with any similar software, can be frustrating with not having any guiding, along with tutorial. In future tutorials, that i will be making, i'll add, as far as can, if not the full guidance, then, at least major explanations, regarding specific product i'm making.
Along with this tutorials, i'll will be covering architectural tutorials, as far as my industrial design field allows me to. How many tutorials will be made, there's no specific number, because, even with this 30 full designing length type tutorials, i'm not even scratching the surface.
One more important thing that i should mention is, do not consider all methods i've used within these tutorials for granted. But use them, rather, only for learning, or, for familiarization purpose. Learning curve is something that gives the answers in time, consequently, we'll get familiar with the correct usage of tools.
This is only the first part, there will be a lot more.
These tutorials can be found at »TutorialField« YT channel.
Most of the these product tutorials, are not fully made products to be produced, but, rather ability of what we can do. Anyone can continue to experiment further, and i'll be happy to see any results made, or even finished products. Still, there's a lot of products to upload, before i go over to the next step, where i'm going to include more elements, regarding quality of tutorials, and what material are in them, from what we all can learn from.
This is another, fairly simple, knife model. If we're going to model a knife, this way, there are just a few steps to consider. The other part, are standards or rules, regarding specific model we must follow.
One more common product on the market.
When i started modeling this hair brush, i thought i'll do it below 10 minutes, it turns out, it's the longest one. But i do want to keep tutorials as shortest possible.
Again, this tutorial is demonstrational, but one that requires narrating. I'll cover those in time. Methods, or, order of steps i used, it might be difficult to understand, but it might also have a logic as modeling progresses throught the video.
In this tutorial, you could find some useful technics to use or learn, or to know about, as in any other tutorial throughout this product design series.
In this video, i've made simple salt shaker concept. Another aproach to specific product i wanted to try modeling, or, i'm intersted in.
Within this product, all parts are kept as simple as can be, but, as a whole product, they'll form nice, simple and stylish product. Another thing i'm interested in, is Freecad ability to present product to customer, without using other software. Customer, or client, may require some sense of realism of the product. We'll do what we are able to do, in shortest time possible, minutes... seconds... depends on situation. Freecad is able to do that for us. I intentionally recorded a bit longer first part of this video, for this very reason.
I also must say, that, this type of tutorial is required to have some sort of talk, or me to explain some steps, but i'll keep this tutorial series for demonstrational purposes. Complete tutorials, so to speak, i will upload occasionally, or simultaneously with these ones.
In this video, i'm modeling a simple faucet shell, as concept only, not the interior.
I've used one simple, and modern, design concept.
I was most interested in ability to model this type of products, doesn't have to be faucet. Also, how fillets and tickness can handle each other.
Still, this faucet model is parametric, but i'll do more experimentations on organic shapes. By modern standards, there shoud be no limitations in designing and bringing the ideas to life.
If we're going to model this kind of products, we must take in consideration technical stuff. I'll be more specific in the future.
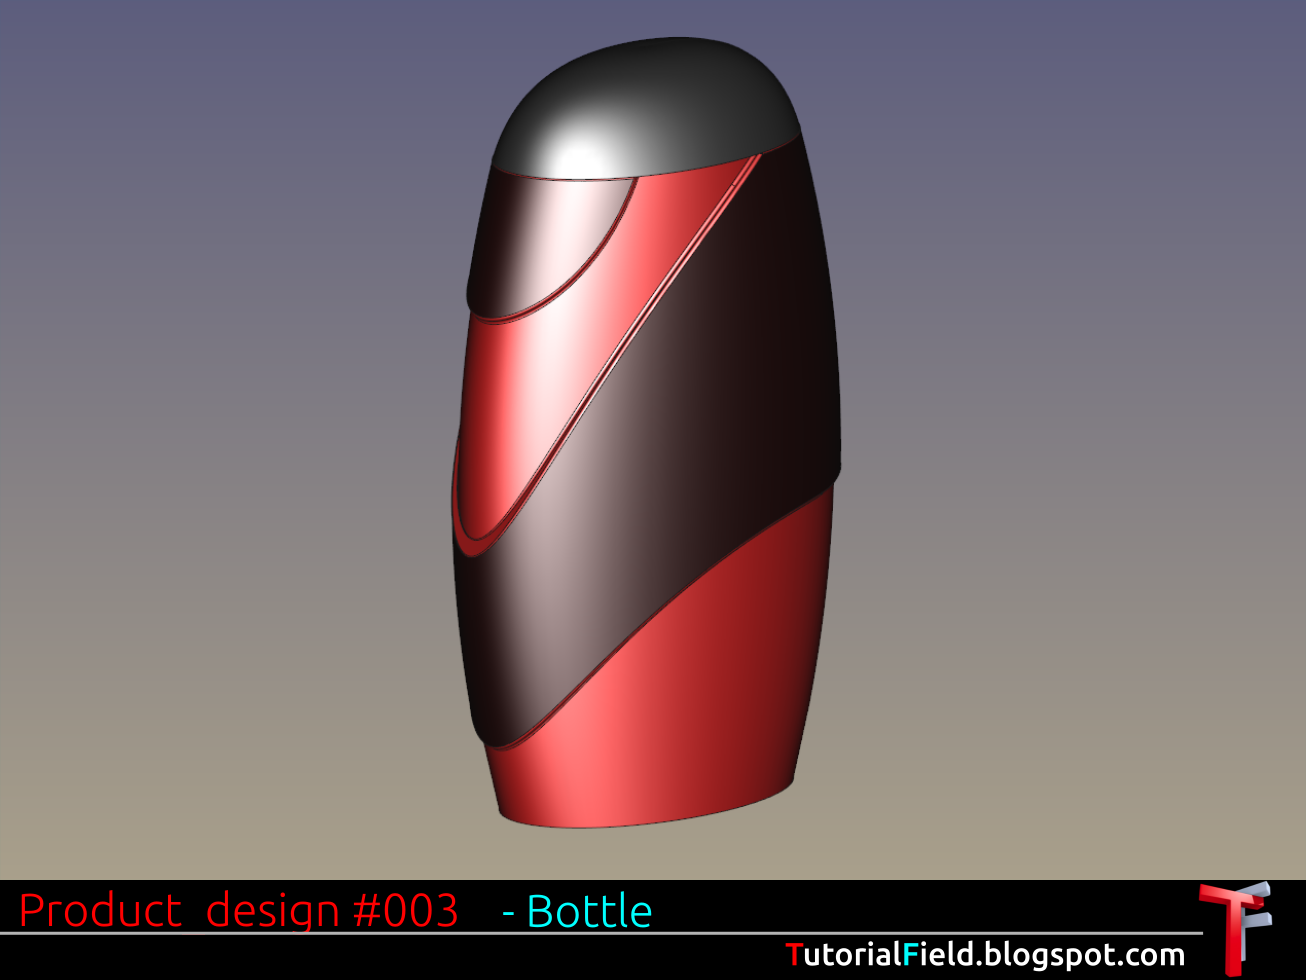
In this tutorial, i've modeled very simple bottle design. A purpose of this video is to test features, mainly tickness and fillet. This video shows how this features are working, in a situations which aren't very complicated. But, these two features, as i am familiar, must work together in a strict way. As for now, i can give one simple advise, and that is, tickness must be smaller then fillet radius.
This is a hammer concept. Model is experimental, and not finished.
It might be confusing with the order of steps i've used. Reason is, it is required to think few or many steps ahead. Some steps i've used intentionally, as i must test, or use specific approach, so i could achieve required shape.
For some steps, within video, specific tools already exist, but, after couple attempts i decided to do those steps manualy, so to speak.
Hammer is common product on the market. Thus, we are all familiar we this tool, but we are not always familiar with the features of the product, to which we don't really pay attention, not ,in general, realted to the hammer.
Maybe in future tutorials i'll actually model a hammer with features we must be familiar with, if we're going to model a real hammer.
This is the screwdriver concept. It can be used one handed, or more often with two hands. Even with the most common tools used, at least some knowledge of human anatomy is required. Handle, should be modeled having those things in mind.
With this model, it's easier, for me, to have every single part, or feature, available for adjusting. This is the major reason why the whole handle has to be modeled out of the parametric shapes. And to avoid using other methods.
Anyhow, approach to screwdriver modeling can vary, and specific approach, might be, or depends by the reason of usage.
I'm not sure if this is the best way to model the pork, but, it did the job. While i was in a process of modeling, i had too many issues in dealing with geometry and parameters. This video shows only whats working. So, it may seem it works all well, but within process, if steps doesn't follow what geometry expects, it just won't work.
To avoid this problems, there is one option for refining geometry, in a way to make resolution, or tessellation, of an object, heavier, so to speak, i think... I'll make another tutorial soon, i hope, and show exactly what i meant, and in what kind of situations this occur, as well how to solve this kind of problematic situations.
This problems will happen more often if we are modeling some sort of organic shapes.
This is another product which, pretty much, is common, or known on the market. Gate, or door latch, exist in so many versions, or designs, you can't count them, function is the same, but mechanism, too, can vary from model to model.
***
I have already prepared many products, and modeling workflow, for uploading. Some of them will be covered with guides, some are without, but it will be useful to many. Many tutorials helped me just by looking at the process of making it...
For situations, which are too complicated to understand by watching only, i'll upload them separetly, with guides.
***
Even within the simplest designs, like this one is (more-less), in designing or modeling process, problems are normal. We can solve them, by using tools available. And there are milion ways we can use them. We just seek for the cleanest solutions. Solving those problems, requires practice. Our approach is done by our logic, and, for that we must be familiar with the tools we are using...
I have already done infinite plane tutorials, (tut1, tut2), but, it is, more/less, outdated. This one i did, kind of, in a hury, i needed a quick solution, without too much tweaking within different properties, or nodes, and so on...
Previously i had, in compare to this one, a ton of nodes, but, doesn't have to be that complicated, except, if situation requires otherwise.
If transparent shadow is required, this is, again, solution for it, as it is shown at the end of this tutorial. So, object, or, product, can be saved along with the shadow, and, doesn't have to be separated layer. There are options, of course, to keep shadow as a separate file, if it's needed.
I hope this tutorial, or, as just a tip, can be useful to anyone.
A bottle, maybe one of the most covered subjects in designing. As i remember, from the time getting into industrial design, there was the whole one period of bottle studying, for students, and for teachers, or professors. Students did have problems with the bottles, and teachers with the student bottles, they were not always the good ones.
But then comes 3d modeling, how to start the "thing" already, just ain't gonna start by watching. I had a fun time, that's for sure.
Now, with this video, i wanted to show the way on how to model comlex shapes by using primitives, or a bit more complex primitives.
It's all in a logical order, by adding or subtracting parts of a material.
If, from a designed model, we can recognize more objects, like those primitives are, than the model will be made of more simple parts in one combined object.
Technic requires practicing, but in the end, it gives us ability to create complex organic shapes, if design requires it.
This is another demonstration of a product design i did, in a video is the rotary switch knob concept only.
For this specific model, i had a problem in ribs modeling. Ribs that were made straight, so to speak, by 90° degrees angle, are easy to make, but, in this situation, where ribs have to follow an angle, i had to think for a while. So, i made one solution shown in a video.
I wanted to make this video shorter, but, i decided to upload the full lenght, and i'll problably record tutorial for any specific problem in a far shorter video, or videos.
This is only demonstration of a workflow i used in modeling this handle design.
This is not learning tutorial, but if anyone can learn even some small tip, i'll be glad. If there's a need for specific tutorial, i'll cover them in a very near future.
This is a simple design, but, i had a lot of problems while i was making it in the Freecad. Once the problems are known, it can be done without any minor problems, or, crashing, freezing and so on.
Problem was to achieve an organic shape. The least painful way was to use simple forms, and combine them in one unique shape, and, no usage of splines, or, surfaces. This way, i had a lot more control over every segment of a model.
There's a ton, so to speak, of a designs a'm going to upload, all of them had a specific issue in making process.
The file used in tutorial can be downloaded at the following link: http://goo.gl/jsFdpc
This
tutorial certainly doesn't cover all there is, that is related to the
Draft Move tool, but, covers basic usage in general. In the following
tutorials i'll try to go through other related tools and features, which
may explain more clearly how does this tool works. Anyone, of course,
can take some time and experiment with the tool, which is can be quite
efficient in learning.
To get complete sense of this tool, it's
good advice to get familiar with the Draft workbench. As soon we get
familiar with the environment, sooner we're going to learn other tools,
as well, predict certain procedures and steps, thus, the end result, or
possible errors to occur.
Another thing to mention is workflow.
While we are at working process, it's very useful to know shortcuts.
This technic can give us very fast workflow, once we get used to it.
This tutorial certainly doesn't cover all there is, that is related to the Draft Move tool, but, covers basic usage in general. In the following tutorials i'll try to go through other related tools and features, which may explain more clearly how does this tool works. Anyone, of course, can take some time and experiment with the tool, which can be quite efficient in learning.
To get complete sense of this tool, it's good advice to get familiar with the Draft workbench. As soon we get familiar with the environment, sooner we're going to learn other tools, as well, predict certain procedures and steps, thus, the end result, or possible errors to occur.
Another thing to mention is workflow. While we are at working process, it's very useful to know shortcuts. This technic can give us very fast workflow, once we get used to it.